September Meeting: Mokume Gane
This month, Nance Ross will be teaching a Mokume Gane project. Here’s a summary from Nance:
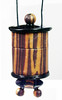
Most of our Guild members have already done some makume gane projects in the past, so for the benefit of new members, we will do a basic stack of thin layers of clay, do the usual holes and/or texturizing, and add a few inclusions. The end result is to make some slices that can be used to cover an altoid tin, a ball of scrap to make a fan pull, or pendant, or other useful and attractive project.
This is planned to be an interactive exchange of ideas on what to add, what products work well with clay (inks, foils, leaf s of various kinds, paints, inclusions etc.) and ways in which to add textures and depth to impressions in the brick prior to stacking. Ways to use the patterns produced on useful and decorative item will also be discussed.
* When: Saturday, September 13, 2008, 1:00 – 4:00 p.m.
* Where: The new Hobby Lobby in Norman, 2417 W. Main, Norman, OK. (The classroom is up front, near the check out stands. Go right after entering & it’s the first door on the right.)
* What To Bring:
* Your ideas to share.
* The usual rollers, slicers, work space, plus three or four of your favorite colors of clay that work well together, pre-rolled to the desired thickness (new members will have the chance to roll their own at the meeting, if you are not sure how to do it for Makume Gane), and any product or inclusion you wish to use, knitting needles or other implements for making holes through the stack of clay, and any example you wish to share of completed projects done with makume gane as a start to creating the project.
* Also might be useful to bring materials for taking notes, as this should be a meeting packed with lots of ideas…..just in time for making Christmas gifts!
Reminder: We will be having a raffle this coming meeting. The prizes are to be provided by Angela, Lee Ann, and Shirley. Members will purchase tickets and place their tickets in a container for the prizes they would like to win. The winners take home the prize and are to provide a prize the next time we have a raffle (every other month).